If you’re a first time RVer, you’re probably dreading needing to dump your RV tanks.
It was all fun and games until you realized you had actual chores to do.
Welcome to the club.
If this is your first time, you’re in good hands. Our goal with this beginners guide is to give you everything you need to make your RV dumping experience smooth sailing.
From the supplies you’ll need, to how (and where) to dump your RV waste, to handy tips you’ll want to know. We’ve covered it all.
As they say, when nature calls…
Let’s get started!
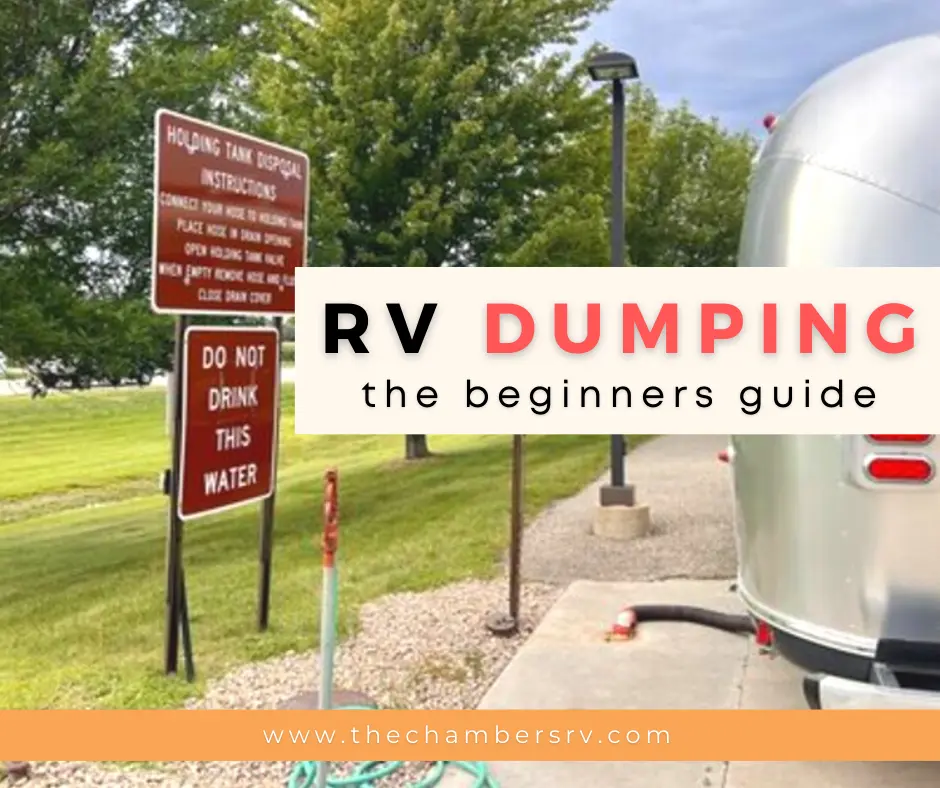
What Is an RV Dump Station?
RV dump stations are designated areas where travelers can dispose of their waste into a secure container (usually a commercial septic tank).
Basically a dump station allows travelers to empty their black water tanks into another bigger tank so they don’t have to haul a bunch of $hit down the highway.
You can just pull up, dump your gray and black water, clean your tanks, and take off to your next destination.
Most campgrounds will have some kind of dump station which is often in a central location, or if you got a full hookup, you’ll be able to connect to the sewer line there. Some gas stations and rest stops will have dump stations too.
It is vitally important that you use these designated spots for disposing of your waste. If not, you can get into serious legal trouble, plus, you’re hurting the surrounding ecosystem.
Critical Supplies You’ll Need For Your Next Dump
Sorry, I couldn’t help myself…
Anyways, you’ll need some key items for your first visit to an RV dump station. These supplies will guarantee a smooth experience.
Most RV dealers will give you the critical items (which we’ll talk about in a sec), but you’re most likely going to upgrade and add to your go to items.
Sewer Hose
First things first, you’ll need a sewer line.
There are a lot of sewer hoses out there. They come in a variety of lengths, materials, and beyond. Most of which will affect the flexibility of the hose.
From our experience, Camco provides some of the best options.
Food for thought.
Sewer Attachments
Next up is the attachments. There are two primary attachments you’ll want:
- Sewer Hose Adapter
- Clear Elbow
- Sewer Support
The adaptor will help you securely attach the hose to any RV dump station connection. You’ll want this because it helps you avoid spills which can get nasty. Luckily, most sewer hoses will have this included.
The clear elbow is nice because it will help you see if your tank is empty or not. If you see black water coming down, you’re not empty. Simple enough.
Then you have the sewer support to easily place your sewer hose at a downward angle to where it needs to end up.
Water Hose (Non-Potable)
You’ll want to keep a non-drinking water hose for cleaning up, plus it’s nice to have one laying around for washing stuff when you need to.
Don’t use your drinking water line. You’ll (potentially) contaminate your fresh water tank.
The utility of having one for just cleaning is high. Plus, they’re cheap which is nice too.
Disposable Gloves
Do not forget these.
Please, for the love of all that is holy, wear gloves when handling your sewer equipment.
Keep a box in your glove compartment. Keep a box in the RV. Keep a box stored away in a junk drawer. I don’t care, just have gloves around.
Also, don’t do reusable gloves. It’s not worth the effort of cleaning.
Disinfectant Spray (Or Wipes)
These are just helpful to clean up everything you touch.
You can wipe down all the gate valves, your hose, the spigot, and much more.
Like I said, nice to have if you’re clean freaks like us.
How to Use an RV Dump Station
Sweet – so you have the material. You’ve got a full tank of poo. Time to get to work.
Before we get started, remember to take your time.
If there’s one thing we’ve learned, it’s not to rush. That only causes mistakes. Also, use a checklist.
They help. A lot.
Let’s take a look at a step-by-step
Lining Up Your Rig To The Dump Station
Before you even line up the rig. Make sure to know where your RVs tank connection is located on the rig. Over time, you’ll get to know your rig inside and out (a lot like a home!) which will make it easy. For now, just take note of the connection.
With that said, you want to line up your sewer gate with the dump station as close as possible, but with enough space to walk around. The length of your sewer line will determine how far you can go.
It helps to have someone giving you directions too.
Connect Your RVs Sewer Hose Plus Attachments
You’ve got the rig all lined up.
You’ve got your gloves on.
Go ahead and pull out your sewer hose and connect it to the dump station first. This way you can figure out the adapter (if needed) and make sure the connection is secure.
Quick note – most RV dump stations will not have a secure way of holding your hose down. You might want to use a cement block or something heavy to hold the hose down so it doesn’t pop out and start spraying everywhere. If anything, you can always have your partner use their foot.
Now, head back to your RV and double check that your valve gates are closed. DO NOT SKIP THIS STEP.
Once you’ve double checked, go ahead and remove the sewer cap and connect your hose to your rig.
Before you release the kraken, double check the o-ring connection on your sewer hose. You want to make sure it’s still around because that creates a leak proof connection.
Let’s move onto the next step…
Test With Gray, Then Black Tank, Then Gray To Finish
With your connections nice and snug, go ahead and run a quick test with your gray tank.
Only do this for a couple seconds. Why? Because it will help you test your connections to ensure no leaks. It’s better to learn you have a leak with dishwater than feces.
Once you’re good, go ahead and pull the valve for your black water tank.
Let it drain completely into the dump station. Go ahead, let it all out.
Once the black tank is empty (you’ll know from the clear elbow) you can start with your gray tank.
The water from the gray tank will provide another flush out of any left over waste within the black tank.
(Optional) Flushing Your Tanks
Something extra you can do if there’s nobody waiting on you to finish dumping is flushing your tanks.
Basically what this looks like is connecting your water hose (remember, non-potable) and running water into your toilet through a window.
Some people try to spray it through the sewer valve, but that’s gross.
You can do this for both your black and gray water tank if you choose. It helps eliminate any extra waste.
Clean Up
Next up is cleaning up after yourself.
This is where you can disinfect your items if you want.
You’ll want to clean your sewer lines of any extra goodies.
It’s recommended you store your sewer lines into a completely separate location so it doesn’t come in contact with any other items.
Quick Tips Dumping Your RV Tanks
Here are some tips we’ve come across that will help you with the process of dumping your black water and gray water tanks.
This list certainly isn’t exhaustive by any means, but it’s a great starting point for those just beginning.
2/3 Rule
When you hit the ⅔ mark of your black water tank (or gray water but it rarely gets full faster), you’ll want to begin actively looking for an RV dump station.
You don’t ever want to get your black water to full capacity because you’ll want enough time to reach a dump station. This is especially true if you’re camping in remote areas where it’s not always the easiest to find legit dump stations.
Use this rule as a way of planning ahead.
Level Your RV Before Dumping
This can help keep a smooth flow. Most RV dump stations are uneven, so much so that they might be at an angle that won’t allow the RV to fully empty the tanks.
If this is the case, you’ll want to use your stabilizer jacks and your blocks.
Close Your Windows & Doors
You’re probably aware, but waste can smell pretty awful. Don’t let your camper get stinky by leaving your windows and doors open.
Keep them closed so you can keep your RV smelling nice.
Bring Gloves and Wipes
They’re just helpful to have around. Keep them easily accessible for when you’re dumping.
You can put them in your glove compartment or the center in your truck.
Don’t Skimp On A Good RV Sewer Equipment
This is not an item where you go cheap.
Opt for quality which will last for a long time.
Some good brands include Camco and Valterra.
Test With Gray Tank
This is helpful to test for leaks.
You don’t need to have your gray tank valve open very long, 3-5 seconds is really all you need.
You’ll be really happy dealing with a leak knowing your only touching shower water instead of urine and feces.
Dump the Black Tank First
This will be true only if you have separate tanks. Some RVs have one single tank designated for both black and gray together.
If you have separate tanks, you’ll want to dump the black tank first.
Then you’ll want to flush out the black tank with water (non-potable) by running water through the toilet.
Do this until the water is clear (hint – look through a clear elbow).
You could also just fill a bucket with water and dump it down the toilet too. That also works.
Gray Tank Gets Dumped Second
Once the black tank has been cleaned out, dumping the gray tank makes sense. This will help clean out the tank and your hose.
Clean Your Sewer Hose
Spray down your sewer hose while it’s connect to the RV dump station.
This will be done once all your tanks are emptied and the caps are put back on.
Spraying down your hose will clear it of any left over surprises.
Then go ahead and disinfect the ends.
Treat Your Holding Tanks
You can treat your tanks which will help keep them clean.
This is helpful.
A favorite among the rv community is the Happy Campers holding tank treatment.
Bag of Ice Trick
Some RVers swear by this as a way of getting any extra gunk off the inside of their black tank.
Basically what you do is get a bag of ice, and after your done dumping your tanks you pour the ice down your toilet into your black water tank. This will help it slosh around inside scrapping off anything as you drive.
It can be useful to do this if you don’t have a sprayer system for your black water tank. Although if you do have one, you probably won’t need to do this.
Good tip to know nonetheless.
9 Places You Can Usually Dump RV Waste
Now that you know the basics of how to dump your RV, the next thing you’ll need to know is where you can commonly find RV dump stations.
Here are 9 places where you can usually dump RV waste legally:
- RV Parks & Campgrounds
- Gas Stations
- RV Dealerships
- National Parks
- Sporting Goods Stores (Cabelas)
- Wastewater Treatment Plants
- Marinas
- Recycling Centers
- City or State Dump Stations
RV Parks & Campgrounds
Most RV parks will have a community use dump station (or if you’re lucky a full hookup site) where you can dump into a commercial septic tank.
If you’re used to boondocking and just need a place to dump your waste, you can often pay these parks or campgrounds to use their dump station.
Just be warned, call ahead so you know if they allow people not staying at the site to dump.
Gas Stations
Quite a few large gas stations have dump stations. Most of the time the gas station will need to be dedicated to big rigs (think Pilot or Flying J).
They might be marked openly or you might need to look on an app to know if they have an RV dump station.
Honestly, you’re going to learn to love gas stations if you get an RV.
RV Dealerships
There’s a good chance an RV dealership will have a dump station. They do this for better customer service, plus it’s a good way to help the community out.
In fact, Camping World is well known for having RV dumping stations at a decent chunk of their locations.
As always, call ahead to see if they have one and if you can use it. Be sure to ask if there are any special instructions for getting to the sewer connection.
National Parks
Quite a few of the national parks have dump stations. You’ll know if they do by checking out their website.
We really enjoy going to Big Bend National Park (love those Chisos Mountains!) and they have a dump station there.
Fun fact – they’re one of the only national parks to run and operate a landfill. Thought that was pretty neat.
Sporting Goods Stores
Cabelas is a hidden gem. Some of them will actually have dump stations – although it’s a 50/50 shot if they do.
Sometimes a Dick’s or Bass Pro Shop will have a dump station, but I’m not the biggest fan of Dick’s Sporting Goods. Not sure why, I just never liked the brand.
Anyways, call ahead to double check and confirm it’s cool with them to unload your waste in their septic tank.
Don’t pull a National Lampoon’s Christmas Vacation…

Wastewater Treatment Plants
Could be a good choice if you’re in a pinch.
Found a wastewater plant with an RV dump station by double checking an app.
Marinas
A boat marina is a good place to look if you’re by the coast. Boats need to unload their waste too and you will typically find a dump station within a marina.
As always, call ahead to double check.
Recycling Centers
You may get lucky with recycling centers. They sometimes have an RV dump station, but you’ll want to check either online or by calling to confirm.
State Parks
Some state parks will have dump stations. A little less common than national parks or RV sites, but some bigger state parks will probably have this amenity.
Finding Free Dumping Stations
Look – free RV dump stations range wider than RV floor plans. From “doable” to “never in my life” and anywhere in between.
So with all that said, if you want to opt for free it’s recommended you look on RV apps (like Allstays) and search for “RV dump stations”, “Dump stations”, or “RV dumps” to find a location.
Don’t expect every dump station to have water (potable or non-potable). They will most likely only have a sewer connection.
Frequently Asked Questions
How Often Do I Need To Dump My RV?
Depends on how often you use your RV. If you’re a weekend warrior then you’ll want to dump after every trip (you definitely don’t want waste sitting in your tank for extended periods of time), but if you’re a full timer then you’ll dump when your tanks are at ⅔ capacity.
Just remember, weight matters when towing a trailer. Your tanks (when full) can get fairly heavy and this will lower your fuel efficiency.
Can I Legally Empty My RV Tanks at Home?
Depends on the state. You have to remember you’re dealing with “toxic” waste because of the fecal matter. This contains germs and other bugs that can hurt the surrounding environment if not disposed of properly.
You should be good if you’re dumping into your own septic tank. However, do not under any circumstances dump into a storm drain. You will be dumping into water reservoirs not built for that kind of waste, and you’ll most likely get into legal trouble.
Final Thoughts
There you have it.
Everything you need to know about RV dumping. From the material to the step-by-step guides.
Hopefully this provides you with enough information to get started unloading your waste responsibly.
Leave a comment if you have any questions!


